Wrx STi bumper and fender body lines got you down? Lift them back up with MAC Lifter!
Just as we ourselves age and sag our car isn’t immune to forces of gravity either. Those pristine body lines are no longer a nice even gap. And maybe your front lip has skid on too many driveways or possible you have replaced your front bumper, headlights or added a front mount intercooler and you want your car to look as fresh as it once did. So what is a car owner to do?

Not too terrible but not great either. It’s time to fix that!
Well MAC lifter kit has something special just for you and your car to turn both that frown upside-down and put those factory body lines back in place where the belong. If you are curious just how to this facelift works and how to install it on your car, keep on reading!
Time frame
The amount of time you need to set aside comes down to how many times you have removed your bumper. For me this was around 45 minutes after the glue had dried. For this install you will want to set aside a bit of time for removing the bumper and allowing curing time for epoxy, glue, etc.. If you don’t have the proper tools or knowledge I would set aside an hour plus.
Tools
With every install there are a list of tools that can make this a much easier job. While it can be done with lesser tools I think this list should help you complete it in the timeline above. The simplest of tools we will need is a phillips screwdriver alongside a couple of ten wrenches. I would also include your favorite clip removing tool. This will sound odd but a good set of shop towels or patio furniture cushions can be a big help for a solo worker. If you have a friend you can bypass the need for these.


Parts
The supplied Mac lifter kit comes with almost everything you need inside, the last item you need to procure is an epoxy that is able to work on both plastic and metal. My choice of epoxy is shown below.


Installation
First things first is the bumper has got to go. I will tell you can do this without fully removing the bumper but it is just easier to do so. The clips you will need to remove will be where the front bumper and fender meet and a couple that keep your fender liners attached to the front bumper. You will find that turning the wheel towards the body of the car will give you adequate working space.

Turning the wheel in to allow you access is necessary unless you lift the vehicle and remove the wheels. Either way will get it down
This may or may not be the clip holding your fender together. You just need to unscrew it with a phillips screwdriver. You may need assistance from your trim tools

With that clip remove you are ready to peel the bumper away from the fender.
After those are disconnected you will want to remove the clips that hold the grill in and slide it forward and on out. Below the grill you will find a handful of clips, remove these and the bumper is ready for removal.

Next up to remove the entire bumper is to remove the grill and then the clips beside the headlights and between the grill

Grill removed we cqan start to see the clips.

Clips all removed and it is time slide the bumper off.

Ready to get to work with the bumper now away.
The next step would be to epoxy the metal bumper supports to the bumper cover. I would start by thoroughly cleaning both surfaces with soap and water, followed by some isopropyl alcohol. I used a light layer of epoxy and then set up multiple clamps to hold it in place while I wait for it to cure.

Using your epoxy you can clean the brackets and bumper before saucing up the Maclifter bracket

Now you can add some clamps or clips to hold it in place while it adheres.
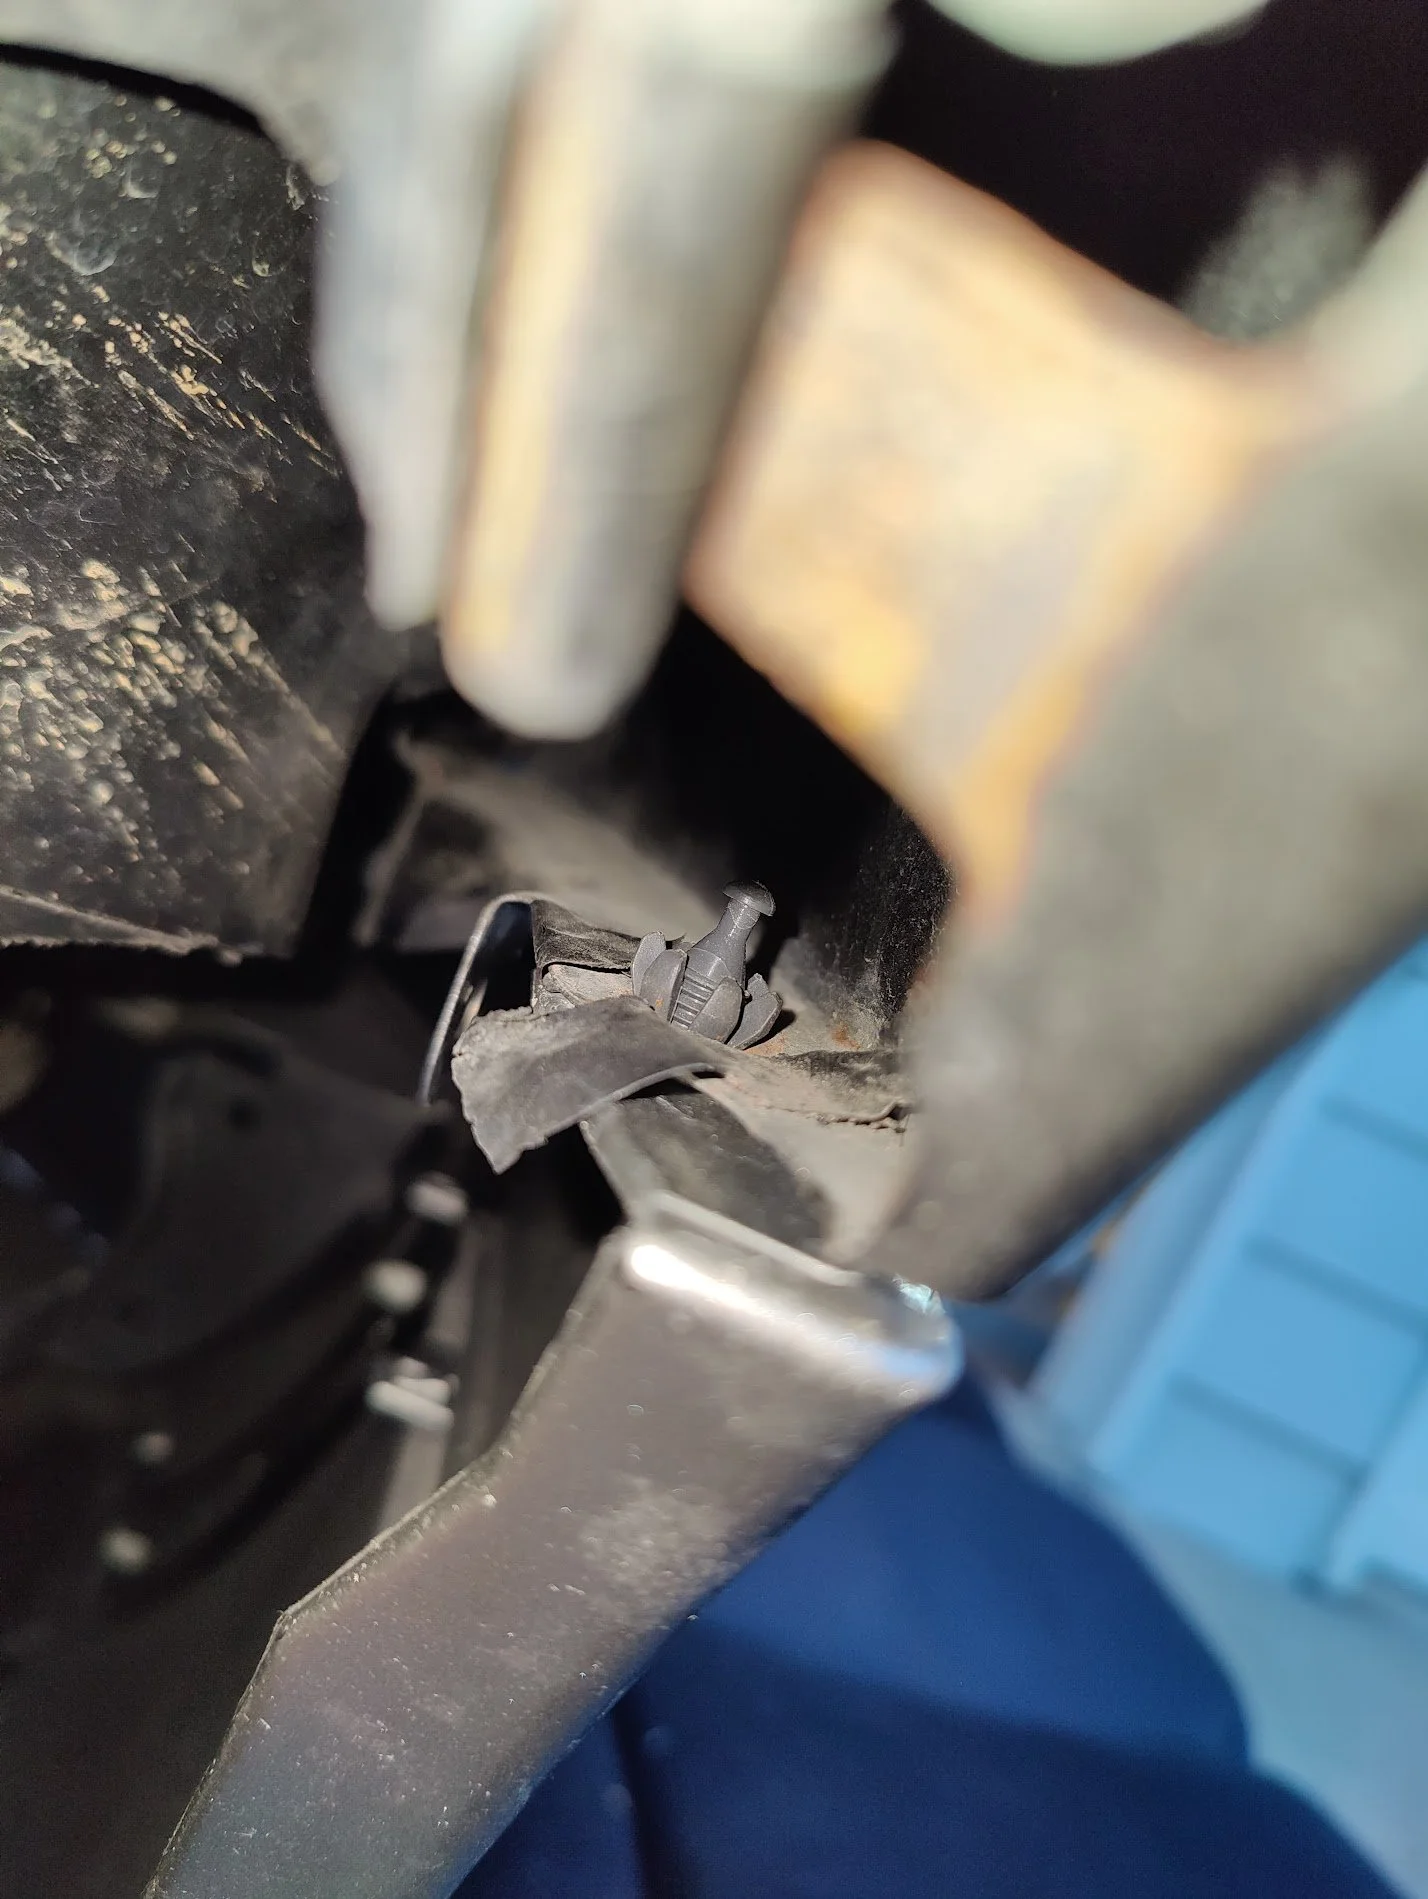
With the bumper cover curing and out of the way you can now find your way to the plastic fender brackets that once held the bumper on. You will need a phillips screwdriver and a pair of pliers to help remove these. With the screw removed you will pinch the plastic portion of the clip that holds it to the fender and you remove it. You can set these aside.
While the epoxy is setting up on the bumper you can remove the old clips that held your bumper in.

With the screw remove you can press the tabs together on the back to remove the assembly.

Tabs removed and the bracket now swings free.

Ready for the Maclifter piece to take it’s place.
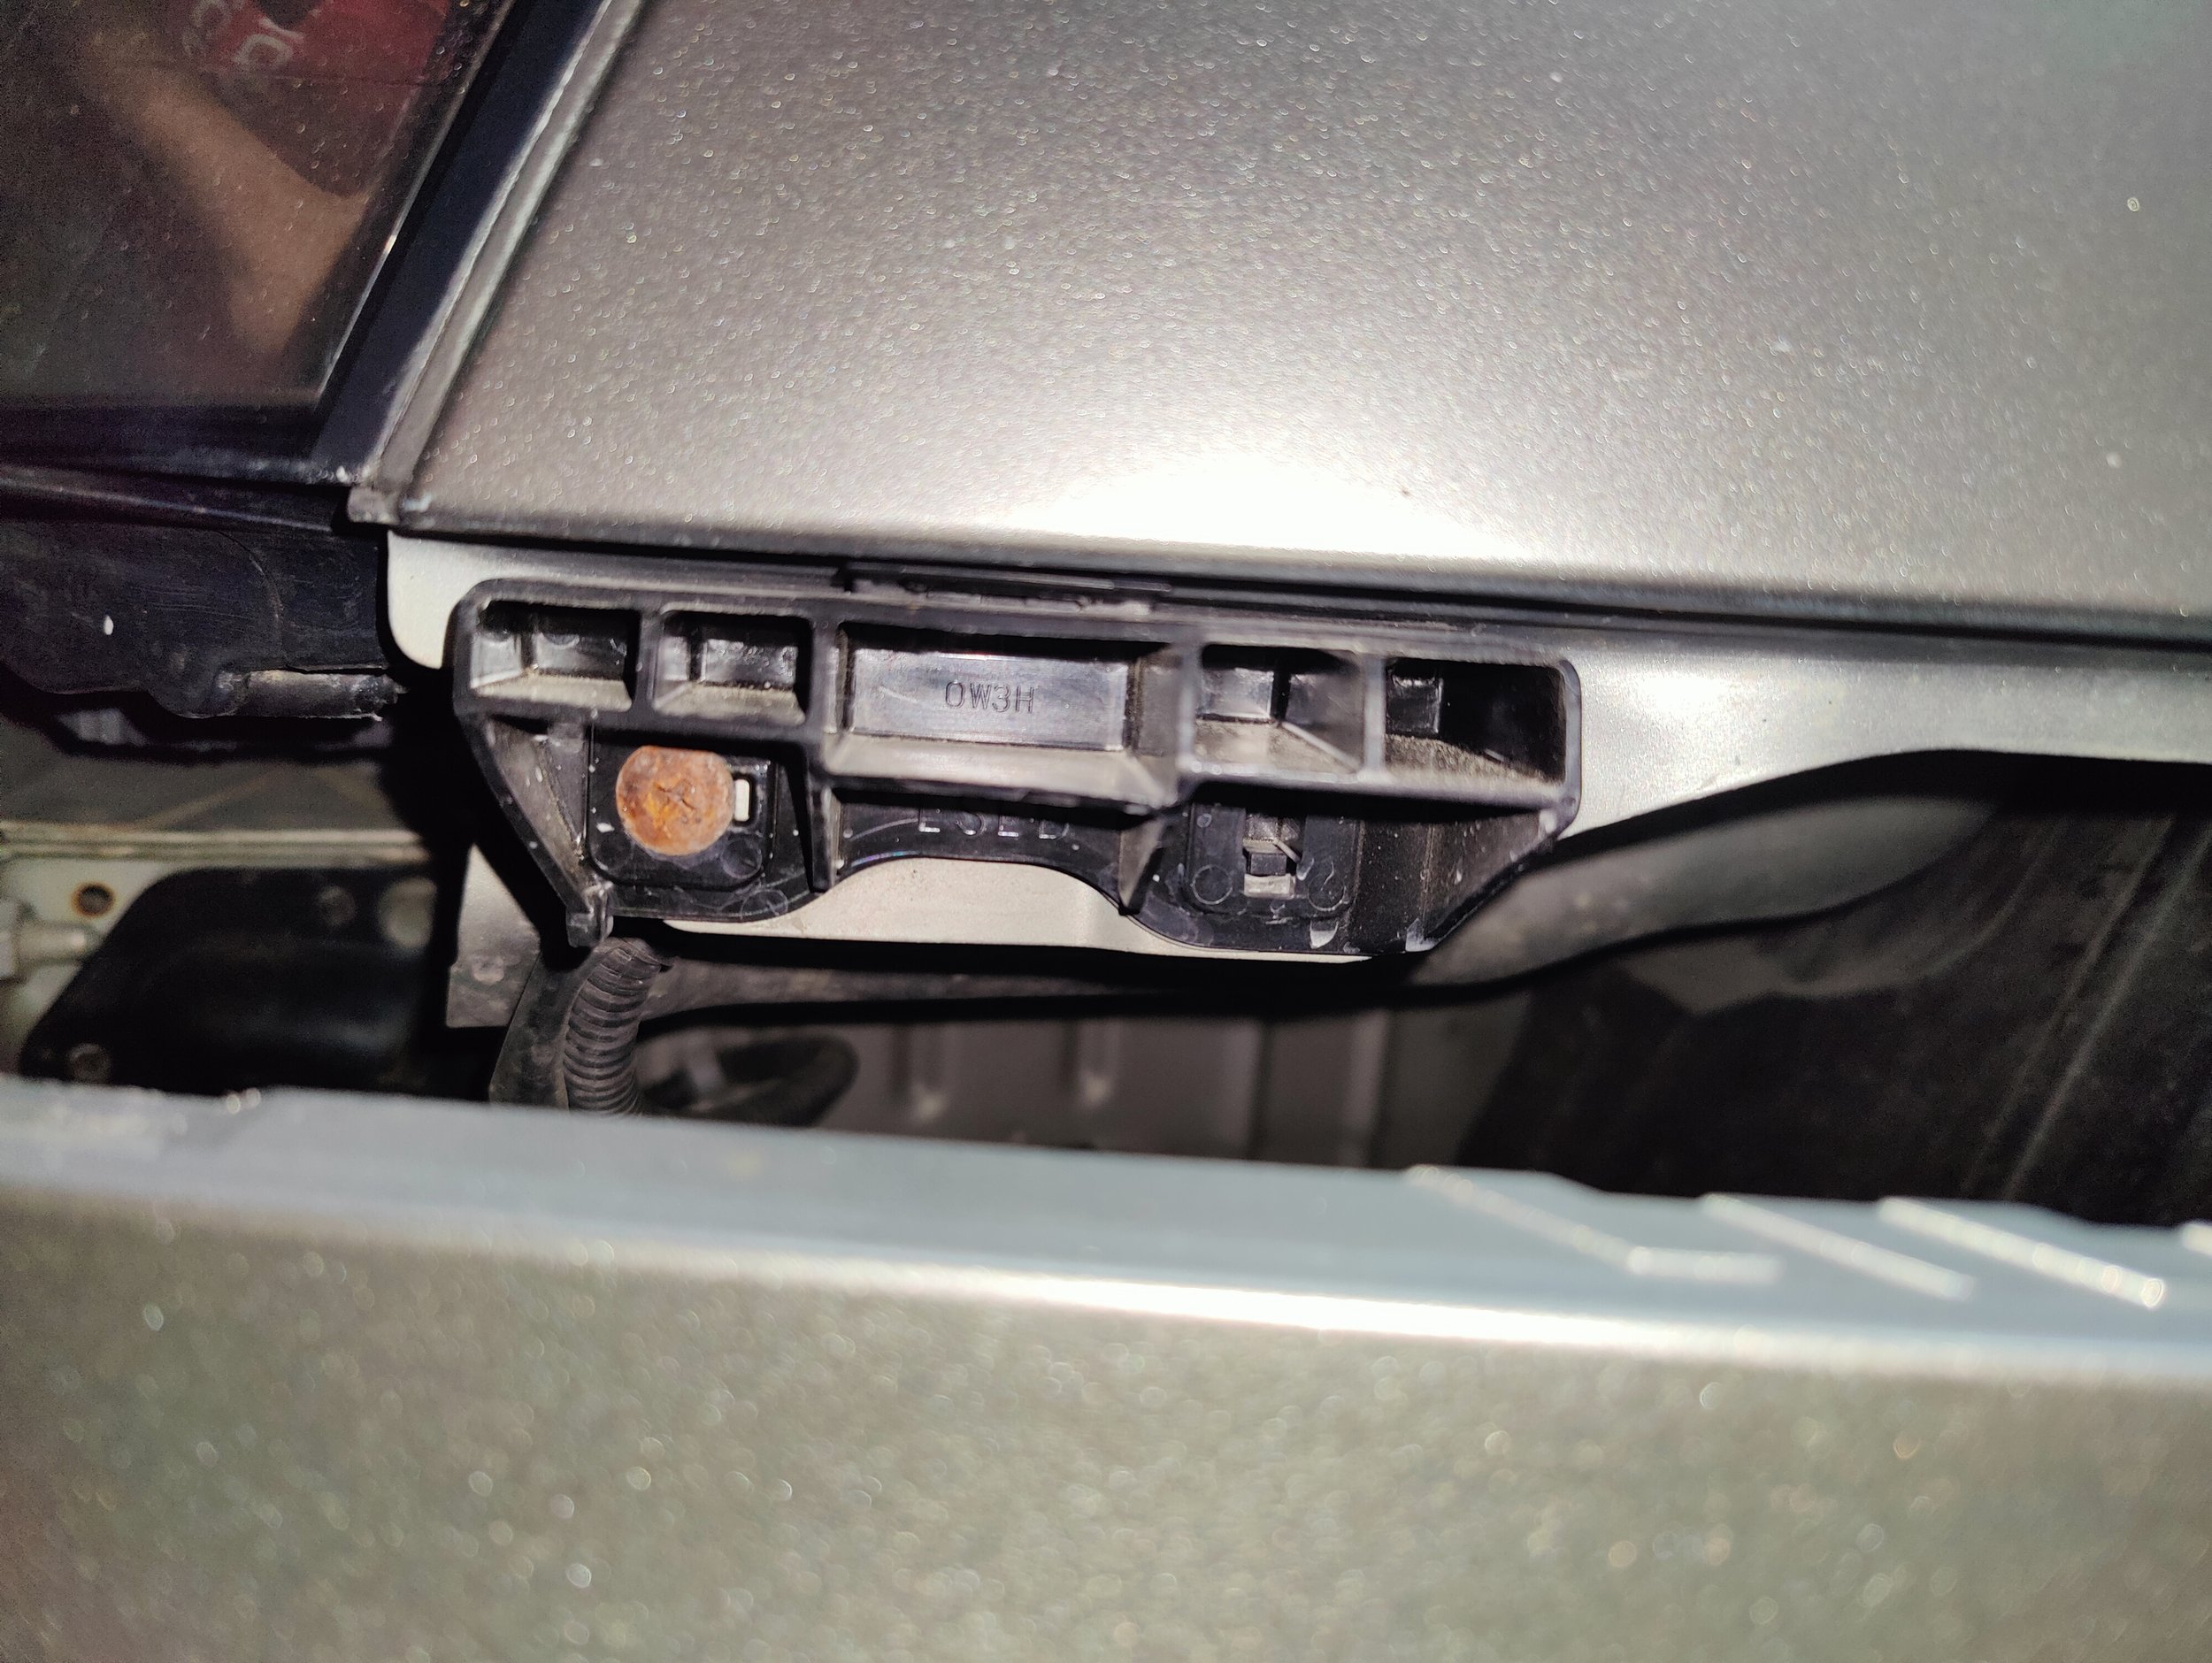
The new MAC lifter metal brackets can now be installed in its place. Below you will see the orientation of the washers and bolts. I would recommend that you do not fully tighten them at this moment, this will be useful later when you are adjusting the bumper lines.

These are the pieces we will need for the installation of the support bracket.

One bolt in.

And the second bolt and nut in. I recommend not to fully tighten these yet so you can make some adjustments after the bumper is installed.
As soon as your bumper cover brackets have cured you can go ahead and reinstall the bumper cover. Now is the time for you to get those body lines as nice and tight as you like. With the fender liner pulled out and the wheel turned in you should have a decent amount of room to adjust the brackets attached to the fenders. This is where you will take your arms diving them into the abyss behind the bumper and use your ratcheting 10 mm wrench and second 10 mm to tighten up the brackets. If you are working on your own I found that stuffing old towels or outdoor furniture cushions under the bumper can help push the bumper up and tighten up the body lines.

Here is our bumper tab support piece ready for install after sitting for 24 hours.
Now you can move on to reinstalling the clips for the bumper. I found that the oem fender to bumper clip no longer installs easily. This is due to the metal brackets making the gap just a bit larger than it once was. I found a standard plastic clip will give you more than enough clamping force to hold these together.

This oem clip won’t be easy to get back into place. I recommend a standard plastic clip, it has worked well for me.
You can now finish up with placing the rest of your body clips in place below the grill and on the fender liners, etc. The grill goes back in and you can now step back and see how if you need to tweak anything.

Readying the bumper for install.

I find using a couple of microfiber cloths will help keep the bumper supports from scuffing the fender while you get everything in place.
With the bumper back in place you can now steer the wheel so you can gain access behind the bumper and adjust/tighten up the bracket as shown below. I cannot get a good image of this with the bumper on so hopefully this gives you enough information to make it happen.

I can’t show this image with the bumper on but this is how I adjust the bracket and bumper fitment with the bumper on. Leaving these bolts slightly loose allows you to push the bracket upwards while reducing the bumper/fender gap.
Here a few of my before and after shots from my car.


Congrats! You can now step back and snap a few photos and celebrate by posting them on Instagram!